 So I thought what could I do that a) Was easy and I didn't have to do much work for (I've never been much great at art) and b) Doesn't take long too do-I'm far too impatient for all that reapply, base coat, reapply, top coat x2 rubbish. c) Would be different from what other people are doing. I thought since this is a blog about the love of times gone, I thought why not try the nail trends that used to be popular. I hope to make this a regular thing and go through the decades, so let me know what you think, because I don't want to bore the blogging world. Now, is everyone sitting comfortably? Here's a little history lesson for you on nail designs and what we did before Barry M Crackle came into our lives.
Before 3000 BC the nude nails were a very hot trend, but after 3000 BC the Chinese, Japanese and Romans started to get a bit bored of the au naturel look and started to add colour to their nails. Sadly Nails Inc wasn't around then so they had to look to nature to help them inject colour into their look. Its main origin is in China where they applied a type of enamel on their fingers, made out of various flower petals including roses, bizzy lizzies,orchids along with beeswax. I feel sorry for the bloke who had to collect that. They would mix it all up and after leaving it for several hours it would turn into a stained/ shiny reddishy pink colour. Blimey, I can barely wait 60 seconds let alone a few hours. In India, people made dye from the Henna plant which left a reddish brown stain, nailing the stained nail trend.
Egyptians also used henna to colour nails and the tips as a sign of beauty.In some societies the colours of your nails was a social significance. In Egypt, higher classes had deeper shades of red, while the lower classes were only allowed to wear pale shades. Queen Nefititi coloured her fingers and toe nails ruby red and Cleopatra coloured them a dusty red. The King also coloured his nails and so did other men. And you thought guyliner was weird.
 Later in China in the Chou Dynasty of 600 BC, royalty enhanced their nails with gold and silver. So even thousands of years ago they were rocking the gold and silver foil trend, Barry M you're a bit behind there. Also a 15th century Ming manuscript cites red and black as the colours chosen by royalty using Henna. Its a shame the royalty doesn't do that now and all have a distinct nail colour. Although, I can't really see the Queen going to events with goth black and bright red nails,can you?
 Nails began to advance in 1830 when the Orange wood stick was invented in 1830 for nails to manicure them by a Dr.Sitts. Before this metal tools, acid and scissors were used. In the early 1800s the almond short and slightly pointed nails were popular. They were sometimes tinted with scented red oil and buffed with a chamois cloth (yes I don't know how to say it either.) It took till 1892 until the wood stick was brought to women and entered the US where nail salons were opened. So we have him to thank for five nail salons in every street then.
By 1900 the first glossy nail varnish was available and was applied with a camel hair brush, but sadly it wore off in a day. A bit like my Rimmel London 60 Seconds nail varnish then. The emery board on a wood centre was invented in 1910 by 'Flowery Manicure Products' a company that manufactured metal nail files.
When the lovely Henry Ford created the Tin Lizzie Ford T car the paint inspired more modern nail varnish colours. Just to clarify there wasn't any bright pink or neon yellow cars, women had to wait a bit longer to have nails like that. Movie stars and celebrities were always seen with beautifully manicured fingers, until 1925 when nail varnish entered the market with a sheer rosy red colour created by French makeup artist, Michelle Mernard. When this happened the 'moon manicure' became extremely popular, and that is where our history lesson is going to end for now and my painful attempts at nail art is going to begin. The Moon Manicure involves painting the middle of the nail, but leaving the moon of the nail (at the bottom) unpainted and the tip. I would like to say that I have absolutely no idea how they did this without those sticky manicure things you can get to put on your nails to separate colours, Greta Garbo my black glittery fedora hat goes off to you.
Etiquette books of the time warned women against painting their nails with 'garish colours' because it was seen as vulgar and unladylike. No bright blue for you then Greta.
 As the decade went into the 30s more colours were available which ranged from light pinks, deep crimson, and cream shades. Even for a short period in 1932 black nail varnish was introduced but it quickly went away again. The goth look wasn't really on trend then, it was more innocent girly then rebel goth. The moon manicure has changed over the years when at the end of the 1930s women just left the bottom of the nail bare, I mean wouldn't you not waste the time if Errol Flynn was on at the cinema? It has also been used in fashion shows and seen in magazines with many mixtures of colours. Dita Von Teese has even been seen with the half moon manicure, so if it is good enough for Dita then it is good enough for me.
But, I have decided to go right back to the roots of the nail varnish and try the first ever proper nail trend. Just to clarify I mean the moon manicure, I'm not going to start picking roses from the garden and trying to make an enamel, I don't think Mummy Second Hand Rose would be too pleased. I am going to try and do it the completely original way with the original colours. Those eight different shades of red you have bought me over the years Great Auntie have finally come to some use. I may live to regret this.
 Due to me not having many of those manicure thin nail sticking thingys and I can't really use all of my sisters, I tried to think of another way to make my nails look at least a little bit like Joan Blondell's nails. So I searched around and found a great way to use something that I'm sure a lot of us have, thanks very much Google. We have all had the annoyance of paper in files getting torn where the hole is punched and to solve our problem there are these circle sticky white hole re-inforcers that you can get. I got a 1000 for £1.99 from WhSmith. So not only do they save hours of ranting and trying to stick pages back together with sellotape and failing, you can also use them on your nails to create the moon shapes. Rejoice! So I had to have a 5 minute which turned into more like a 45 minute think of where on earth I had put those saviours and had to tip my stationery draw upside down. Along with the hundreds of pens that don't work I found the white circle saviours!! Joanie honey eat your heart out!! I remember being with my mum in WHSmith being dragged around getting stationery for school and me saying 'Blimey these are expensive aren't they?' I am a bit tight, and she said 'Oh you will find another use for them.' How right you were mother!
 So I started off by cleaning my nails and make them look a bit less like I had been playing in the mud like a toddler and more like a glamorous woman. I then attempted to file them into the almond shape which was popular at the time. Due to being a bit of a nail biter, I don't have much of some of the nails to file, so I suggest if you want to try this, try and grow your nails, or you can use my little tip that I will share later on, stay tuned. I then covered them with my new base coat. I spent £5 on a Rimmel combined top and base coat,used it once and it leaked all in my bag. I'm still morning from it even though it was two months ago and I'm now stuck with a nail varnishy smelling bag that has a rock hard bottom. The new one I bought is No7 So Smooth Base Coat. I wouldn't normally by No7, but I had a voucher so I took advantage of that and stocked up. See I told you I was a bit of a skinflint. So far so good with it, it goes on easily with a wide brush. It claims to improve wear and condition of the nail. Thank god for that, all that fondant moulding I do for my cakes does play havoc with my nails.
 I then cut the hole re-inforcers in two, I tried using them at the top of the nail but it didn't really make a good shape, so I just used them for the bottoms of the nails. I'm sure you could use them for the top but I kept getting them stuck on my fingers and by the time I got them on my nails, the stickiness had legged it. I put manicure stickers on the top of the nails, due to me having small nails I could cut some and put them on another nail. I then covered the nail with my red nail varnish, trying my best not to get any polish on my skin, which always happens to me. I only did one coat but I always put it on quite thick and this nail varnish didn't seem like it needed another coat. I used Geisha's Seal Nailed Polish by Sleek Makeup, and yes it was out of a collection that I got for Christmas.Plus I was getting a bit impatient by now. I let it dry, well attempted to for around five minutes. I should mention that by this time this was my third go at it so I was determined to make it work. I always end up messing the nails up while they are drying or putting too much on and getting that bubble effect. I'm sure with practice this can be done smoothly and easily. If you don't have long nails you can always use a white nail pencil to colour your nail. I don't have one of them so I tried it with my white eye liner and it does look good, god knows what nail biters did in the 20s without it. You can also put white manicure nail varnish on your nails, either before or after you put the red on. I tried it twice before hand and it didn't really work for me, although I think my impatience and putting the nail varnish on too thick didn't help.
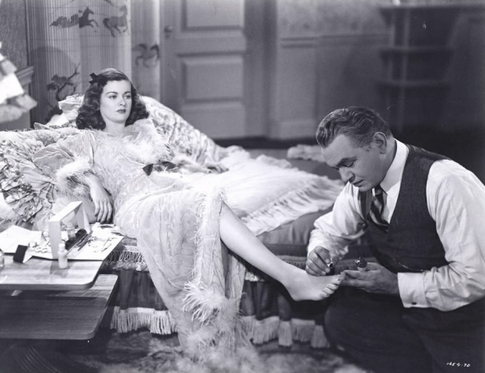 So after what felt like forever, I carefully peeled off the stickers. You really have to do this carefully because it can easily mess up. Some of the nail varnish had messed up a bit on the tops, see I told you I was messy but the bottoms worked well. I then added a coat of the base coat again because my 17 lasting fix brush had stuck all together, I think I need a trip to Boots. This design is interesting but is quite hard to do and you have to be careful and it helps if you are not a messy bee like me. Ladies this is certainly not a design to try when you are getting ready to go out for an evening. Like I said earlier my hat goes off to the movie stars or their makeup artists who did this design without the stickers. I'm sure some of you may be able to do this effortlessly. I like this nail design but its not the easiest thing in the world to do,so I think I'll leave this to you Jean Harlow, although I think Joan Bennett in the film Scarlet Street has the right idea.
Second Hand Rose
XxxX
your nails turned out really pretty :)x
ReplyDeleteThat's fascinating - didn't realise there was so much history to it. When Grandma told me years ago that I should leave the bottom white part of the nails unpainted I thought she'd gone off her rocker. Sorry Grandma! You were right after all. X
ReplyDeleteYour post is really inspiring :D Learning all about nails! I love the little history you thoughtfully wrote in the post :D Thank you for sharing and I love the color of your nails.
ReplyDeletex0x0
lifelittlesurprises.blogspot.com
Aww hun your nails look lovely ! You did a really good job ! You will pick the nail painting up , it's only because I change my nail colour more than once a week (I actually think I have an addiction!) that I can paint neatly. Practice makes perfect ! I have seen these nails around recently, Dior also did them a couple of years back with a gorgeous lilac colour ! Loved the history of it, I never really stop to wonder how it all started off - maybe becuase I'm always too high off the nail varnish fumes ! haha
ReplyDeleteThank you for the mention as well ! Mwaaaaa
D xxx
Sooo good. Follow me please.
ReplyDeletewww.fashionfootprints.blogspot.com
x
This comment has been removed by the author.
ReplyDeleteWho started the half moon manicure or how did it start?
ReplyDeleteAnd Why?
We strongly advise obtaining artificial nails if you want to add pizzazz to your attire or express originality, art, and season. However, it’s crucial to be aware that in order to keep fake nails in place and looking good, they must be maintained. Every two to three weeks, our nail professionals advise in-fills for artificial nails. This nail design, which accentuates both long and short nails, is fantastic!. Our Website.
ReplyDelete